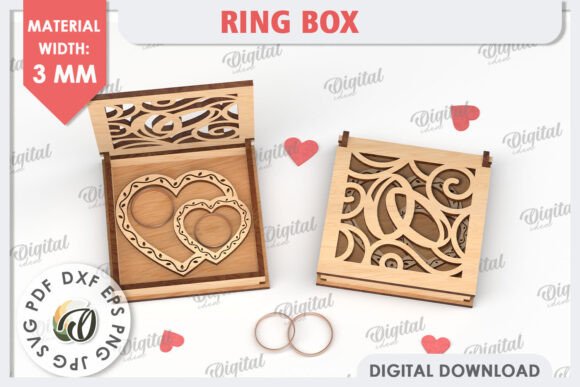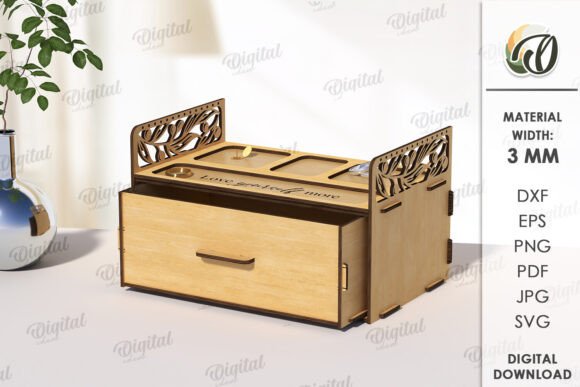
Mastering the 3D Wooden Jewelry Box Laser Cut Design for Precision Crafting
There is a distinct satisfaction in watching a flat sheet of wood transform into a functional, three-dimensional object. For makers, hobbyists, and small business owners, the 3D Wooden Jewelry Box Laser Cut represents more than just a project; it is a test of precision, material knowledge, and design integrity. However, many enthusiasts rush into this craft assuming that any digital file will yield perfect results. This assumption often leads to wasted materials, frustrated customers, and hours of unnecessary sanding or gluing.
It is crucial to understand from the outset that when you purchase a design labeled as a digital product, you are buying the blueprint, not the physical box. The photos you see online are intended strictly for inspiration, showcasing what is possible with the right technique and materials. Your actual purchase consists of a zip folder containing one design in versatile formats such as SVG, DXF, EPS, PDF, JPEG, and PNG. Understanding this distinction is the first step toward avoiding common pitfalls in laser cutting and assembly.
The Misconception of Universal Compatibility
One of the most frequent mistakes beginners make is assuming that a single vector file works identically on every laser cutter. In reality, kerf—the width of the cut made by the laser—varies significantly between machines. A design optimized for a high-powered industrial CO2 laser may fit loosely on a desktop diode laser, resulting in a jewelry box that falls apart or requires excessive adhesive.
Why this matters: If you ignore machine-specific adjustments, your joints will either be too tight to assemble without breaking the wood or too loose to hold structural integrity. This affects both the usability and the professional presentation of your final product.
Better approach: Always perform a test cut on a scrap piece of the same material you intend to use. Measure the actual kerf of your machine and adjust the design scale slightly if necessary. Many experienced creators keep a "kerf chart" for different materials and thicknesses, allowing them to anticipate adjustments before cutting the final piece.
Overlooking Material Thickness and Grain Direction
Another critical oversight involves material selection. A 3D Wooden Jewelry Box Laser Cut design is typically engineered for a specific wood thickness, commonly 3mm or 1/8 inch. Using plywood that is slightly thicker or thinner than specified can ruin the friction-fit joints that make these boxes elegant and glue-free.
Furthermore, the grain direction of the wood plays a pivotal role in structural strength. Cutting against the grain on thin tabs or hinges can lead to breakage during assembly or daily use. This is particularly important for jewelry boxes, which may hold heavier items like watches or metal bracelets.
- Check specifications: Verify the recommended material thickness in the file documentation before purchasing wood.
- Inspect the wood: Avoid sheets with large knots or voids in the layers, as these weaken the structure.
- Align the grain: Ensure that stress-bearing parts run parallel to the wood grain for maximum durability.
Neglecting File Format Nuances
When you download your zip folder, you will find multiple file formats: SVG, DXF, EPS, PDF, JPEG, and PNG. A common error is using raster images like JPEG or PNG for the actual cutting process. These formats are pixel-based and do not provide the precise vector paths required for clean laser cuts. Using them can result in jagged edges, burned corners, and inaccurate dimensions.
Practical advice: Use SVG or DXF files for importing into your laser software. These vector formats maintain mathematical precision regardless of scaling. Reserve the JPEG and PNG files for reference, marketing materials, or visual guides during assembly. If you are unsure how to handle these files, take time to learn the basics of vector editing software. This skill empowers you to make minor customizations, such as adding a monogram or adjusting compartment sizes, making your design truly original for your home or office.
Assembly Errors and Finishing Oversights
Even with a perfect cut, poor assembly can undermine the quality of your 3D Wooden Jewelry Box Laser Cut. Many creators rush the gluing process, applying too much adhesive which squeezes out and stains the wood, or too little, leading to weak joints. Additionally, failing to sand the edges after cutting can leave behind char marks or sharp splinters that detract from the premium feel of the box.
To avoid these issues, adopt a dry-fit strategy. Assemble the entire box without glue first to ensure all parts align correctly. This step allows you to identify any tight spots or misalignments before committing to permanent adhesion. Once satisfied, use a high-quality wood glue sparingly, applying it with a fine tip or toothpick for precision. Clamp the pieces gently but firmly, and wipe away any excess glue immediately with a damp cloth.
Maximizing the Value of Your Digital Purchase
Remember that the possibilities of creation are endless when you have a reliable digital foundation. This design is a great solution for creating an original aesthetic for your home or office, but it also serves as a viable product for small businesses. By avoiding the mistakes outlined above, you enhance efficiency, reduce waste, and improve the overall quality of your output.
Before you begin, consider the end user. If you are crafting this for sale, think about the packaging and presentation. A well-finished wooden box suggests luxury and care. If it is for personal use, consider customizing the interior compartments to fit specific items like rings, necklaces, or cufflinks. The flexibility of the digital format allows you to iterate and improve upon the base design.
If you encounter difficulties or have specific questions about the file compatibility with your machine, do not hesitate to reach out. Communication with the designer can clarify ambiguities and provide tips tailored to your specific setup. Thank you for visiting my store, and remember that patience and attention to detail are your best tools in laser crafting.
Happy shopping, and may your cuts be clean and your assemblies seamless.