Mastering the Easter Bunny 3D Layered Shadow Box: A Complete Guide to Laser Cutting and Digital Crafting
The tradition of Easter is deeply rooted in themes of renewal, creativity, and the celebration of spring. In recent years, this seasonal joy has found a new medium through digital fabrication, specifically in the form of 3D layered shadow boxes. Among the most popular designs is the Easter Bunny Egg 3D Layered Shadow Box, a project that combines intricate laser-cutting techniques with vibrant printable details. For hobbyists, small business owners, and DIY enthusiasts, understanding how to create these pieces is not just about following instructions; it is about mastering a blend of traditional craftsmanship and modern technology.
This guide explores the intricacies of creating a beautiful Easter Bunny 3D Shadow Box using layered laser-cut designs. We will delve into the technical requirements, the importance of material preparation, and the broader significance of such projects in modern creative practices.
Understanding the Mechanics of Layered Shadow Boxes
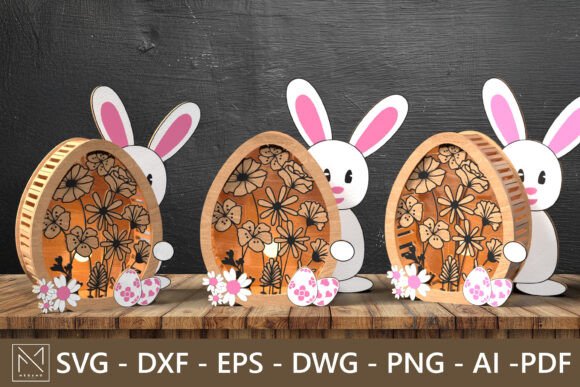
A shadow box is a type of framed display case with a deeper profile than standard picture frames, allowing for three-dimensional objects to be displayed inside. When applied to paper crafting or wood crafting via laser cutting, the "layered" aspect refers to stacking multiple sheets of material, each cut with different shapes, to create depth and perspective. The Easter Bunny design typically features a foreground with the bunny character, mid-ground elements like flowers and eggs, and a background that sets the scene.
The magic of this specific design lies in its dual functionality. It serves as both a static piece of home decor and, when equipped with LED lighting, a charming night light. This versatility makes it an ideal gift for Easter, appealing to children and adults alike. The interplay of light and shadow through the layered cuts adds a dynamic quality that flat prints cannot achieve, transforming a simple image into a tactile experience.
The Role of Precision in Laser Cutting
Laser cutting has revolutionized how we approach intricate crafts. Machines like the Glowforge, xTool, and Cricut Maker (with laser attachments) allow for precision that is difficult to achieve by hand. However, this precision requires careful preparation. The design file for the Easter Bunny Shadow Box includes specific cutting lines, often marked in red and blue strokes. These color codes are not arbitrary; they instruct the laser machine on which lines to cut through completely and which might be used for scoring or engraving.
For beginners, it is crucial to understand that the kerf—the width of the material burned away by the laser—can affect the fit of the layers. Adjusting settings based on the material thickness ensures that the layers stack neatly without gaps or excessive friction. This attention to detail is what separates a amateur craft from a professional-looking piece of art.
Material Preparation: The Print-Then-Cut Method
One of the most significant advantages of this particular digital file is its inclusion of printable color details. Unlike traditional shadow boxes that rely solely on the natural color of the material (such as brown kraft paper or plain wood), this design allows for full-color imagery. The file includes pre-designed graphics for the rabbit, flowers, and eggs, which are intended to be printed directly onto the wood or heavy cardstock before cutting.
Why is printing before cutting essential? Alignment is the primary concern. If you cut the shape first and then attempt to print the design, even a millimeter of misalignment can ruin the aesthetic. By printing first, you ensure that the colorful details land exactly where the laser will cut. This method, known as "print-then-cut," is a standard practice in professional signage and packaging but is now accessible to home crafters.
- Step 1: Select high-quality wood veneer or heavy cardstock compatible with your printer.
- Step 2: Print the color layers using the provided PDF or PNG files.
- Step 3: Allow the ink to dry completely to prevent smudging during handling.
- Step 4: Load the printed material into the laser cutter, ensuring the grain direction aligns with the design if necessary.
- Step 5: Execute the cut using the SVG or DXF files provided.
It is recommended to perform a test cut on a scrap piece of the same material to calibrate the laser power and speed. This step prevents waste and ensures that the final product is flawless.
File Formats and Compatibility
In the world of digital crafting, file compatibility is key. The Easter Bunny Shadow Box package includes a variety of formats to suit different software and machines. Understanding these formats can help users troubleshoot issues and optimize their workflow.
- SVG (Scalable Vector Graphics): Ideal for web-based design tools and many consumer laser cutters. It maintains quality at any size.
- DXF (Drawing Exchange Format): Commonly used in CAD software and older laser cutting systems.
- AI (Adobe Illustrator): Best for users who want to edit the design elements extensively before cutting.
- PDF and EPS: Useful for printing the color layers accurately across different operating systems.
Most modern laser machines, including the Glowforge and xTool, handle SVG files natively. However, having access to AI and DXF files provides flexibility for users with specialized industrial machines or those who prefer desktop-based design software.
Customization and Scalability
A common question among crafters is whether the design can be resized. The answer is yes; the size is adjustable. Because the design is vector-based, it can be scaled up or down without losing resolution. This feature is particularly useful for creating different versions of the shadow box. A smaller version might serve as a delicate ornament, while a larger version could become a centerpiece for a living room mantel.
When resizing, it is important to maintain the proportional relationship between the layers. If the background is scaled differently from the foreground, the 3D effect may be distorted. Additionally, if you plan to add lighting, scaling up the design allows more space for LED strips or puck lights, enhancing the glow effect.
Integrating Lighting for Enhanced Effect
To transform the shadow box into a night light, consider integrating warm-white LED strips behind the back layer. The light will filter through the semi-transparent wood or paper, highlighting the cut-out details of the bunny and flowers. This technique creates a soft, ambient glow that is perfect for bedrooms or nurseries. Ensure that the wiring is concealed within the frame to maintain a clean, professional look.
The Broader Impact of Digital Crafting
Beyond the immediate satisfaction of creating a holiday decoration, engaging in projects like the Easter Bunny 3D Shadow Box fosters valuable skills. It encourages problem-solving, spatial reasoning, and technical proficiency with digital tools. For educators, these projects can be adapted to teach geometry, physics (light and shadow), and computer-aided design. For small business owners, mastering these techniques opens up opportunities for selling unique, handmade goods on platforms like Etsy.
Moreover, this trend reflects a shift towards personalized, meaningful consumption. Instead of buying mass-produced decorations, individuals are investing time in creating items that carry personal significance. This aligns with the principles of sustainability, as crafters can choose eco-friendly materials and reuse digital files indefinitely.
Common Misconceptions and Tips for Success
Many beginners assume that laser cutting is a "set it and forget it" process. In reality, it requires active monitoring and adjustment. Another misconception is that any wood can be used. It is crucial to use woods that are free of resins and adhesives that can release toxic fumes when burned. Always verify material safety data sheets before cutting.
Key Takeaways for Success:
- Always print before cutting to ensure alignment.
- Use the correct file format for your specific machine.
- Test settings on scrap material to avoid wasting resources.
- Consider lighting options early in the design phase.
In conclusion, the Easter Bunny Egg 3D Layered Shadow Box is more than just a festive craft; it is a gateway to mastering modern digital fabrication. By combining precise laser cutting with vibrant printable details, creators can produce stunning, professional-quality decor. Whether for personal enjoyment, educational purposes, or commercial ventures, this project offers a rewarding blend of creativity and technology. As you embark on this crafting journey, remember that patience and attention to detail are your most valuable tools.