Mastering the Spring Field 3D Layered Paper Cut for Professional Results
Creating depth and dimension with paper is an art form that bridges traditional craftsmanship with modern digital precision. The Spring Field 3D Layered Paper Cut represents a sophisticated approach to this medium, offering creators a way to produce stunning visual narratives through stacked layers. Whether you are a seasoned designer looking to expand your portfolio or a hobbyist eager to try something new, understanding the nuances of this specific template is crucial for achieving a polished final product.
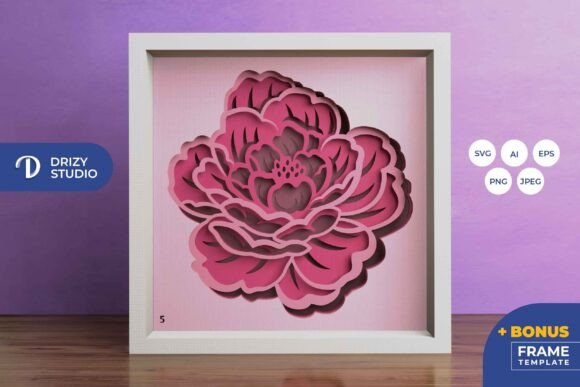
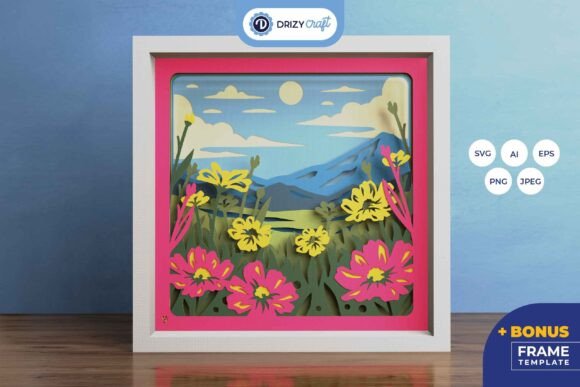
This particular design, often referred to as the Flowers 3D Shadow Box, captures the essence of a blooming meadow in a compact, square format. However, many enthusiasts rush into the cutting and assembly process without fully appreciating the technical requirements and artistic considerations involved. By overlooking key details, you risk compromising the structural integrity and aesthetic appeal of your work. This guide aims to correct common misconceptions and provide actionable advice to ensure your project succeeds.
Understanding the Template Specifications
Before you even power up your cutting machine, it is vital to understand what you are working with. The Spring Field 3D Layered Paper Cut is not just a simple image; it is a complex engineering diagram for paper art. You receive the template in multiple formats, including AI, EPS, PNG, SVG, and JPEG. Each serves a distinct purpose.
A frequent mistake beginners make is attempting to use the preview JPEG for cutting. While the high-resolution 3000 x 2000 px JPEG is excellent for visualization, it lacks the vector data necessary for clean cuts. Always rely on the SVG, AI, or EPS files, which are provided at 714 x 714 px. These vector formats ensure that your Silhouette, Cricut, or other cutting machines interpret the lines accurately, preventing jagged edges or missed cuts that can ruin delicate floral details.
Common Pitfalls in Material Selection and Preparation
The quality of your final shadow box is directly proportional to the materials you choose. One of the most significant errors creators make is using paper that is either too thin or too thick. If the cardstock is too flimsy, the nine layers will not hold their shape, causing the entire structure to sag or collapse under its own weight. Conversely, paper that is too thick may not fit within the frame or could cause the layers to bulge unnaturally, distorting the intended perspective.
Practical Advice: Opt for high-quality cardstock with a weight between 160gsm and 200gsm. This range provides enough rigidity to maintain the 3D effect while remaining flexible enough for intricate cuts. Additionally, consider the color palette carefully. Since the final product color may vary slightly due to lighting and paper choice, test a small section first. Using contrasting colors for each layer can enhance the depth, but sticking to a monochromatic scheme with subtle gradients can create a more sophisticated, ethereal look.
Assembly Errors That Compromise Structural Integrity
Assembling a nine-layer design requires patience and precision. A common oversight is the improper application of adhesive. Using too much glue can cause the paper to warp, creating unsightly bubbles and wrinkles that are impossible to fix once dry. On the other hand, using too little adhesive results in layers shifting over time, which misaligns the intricate floral patterns and breaks the illusion of depth.
- Use double-sided tape: For most layers, thin double-sided tape offers a cleaner, faster, and more uniform bond than liquid glue. It minimizes warping and allows for slight repositioning if needed.
- Spacer consistency: Ensure that the spacing between each layer is uniform. Inconsistent spacing can throw off the focal point of the design, making some elements appear closer or farther than intended.
- Alignment checks: Before pressing any layer down permanently, dry-fit the pieces. Use the registration marks or corners of the square template to ensure perfect alignment.
Maximizing Visual Impact with Lighting
Many creators treat the Spring Field 3D Shadow Box solely as a static wall decoration, missing out on its potential as a dynamic lightbox. Adding LED strips between the layers can transform the piece, highlighting the intricate cutouts and casting dramatic shadows that enhance the 3D effect. However, integrating lighting requires foresight.
A critical mistake is adding lights after the box is fully assembled. This often leads to messy wiring visible from the front or inadequate illumination because the LEDs are blocked by upper layers. Instead, plan your lighting setup during the assembly phase. Place slim, battery-operated LED strips along the inner edges of the frame or between specific mid-layers where they can illuminate the central floral elements without overpowering them. Ensure the power source is accessible for battery changes without disassembling the entire piece.
Resizing and Aspect Ratio Considerations
Flexibility is one of the advantages of digital templates, but it comes with constraints. The SVG file included in the package can be resized, but you must maintain the same aspect ratio. The original size is 20.32×20.32 cm, a perfect square. Distorting this ratio by stretching the design horizontally or vertically will distort the flowers and grass, making them look unnatural and unbalanced.
If you need a larger or smaller version, scale the design proportionally. Keep in mind that resizing affects the complexity of the cut. Smaller sizes may result in fragile pieces that are difficult to weed and assemble, while larger sizes may require heavier paper to prevent sagging. Always adjust your blade depth and pressure settings on your cutting machine according to the new size and paper thickness.
Who Is This Project Suitable For?
This project is versatile enough for various skill levels, but it demands attention to detail. Beginners should not be discouraged by the nine layers; instead, view it as a structured learning experience. Start by organizing your layers numerically and working from the back to the front. Professionals and entrepreneurs can leverage this design for custom gifts, home decor products, or educational workshops. The Spring Field 3D Layered Paper Cut serves as an excellent example of how digital tools can enhance traditional crafts, offering a scalable solution for small business owners looking to offer unique, handmade items.
Final Checks Before You Begin
Before you start cutting, take a moment to review your workspace and tools. Ensure your cutting mat is clean and free of debris that could interfere with the blade. Verify that your software correctly interprets the SVG paths, checking for any stray lines or open shapes that might cause cutting errors. Remember, the images provided are for preview purposes, so trust the vector files for accuracy.
By avoiding these common pitfalls and adhering to best practices, you can create a Flowers 3D Shadow Box that is not only visually striking but also structurally sound. Whether you gift it to a friend, display it in your home, or sell it as part of your creative business, the effort you put into precision and planning will shine through in the final result. Embrace the process, respect the materials, and let the layered depth of the spring field come to life in your hands.